How to Create a Login System in Flask — Complete Step-by-Step Guide (2026)
Imagine you built a beautiful web app — a personal dashboard, a task manager, or an online store. Everything works perfectly. But there is one problem: anyone who visits the URL can see everything. There are no accounts, no passwords, no private data. Anyone is anyone.
That is exactly why user authentication matters.
A login system is the digital front door of your application. It decides who gets in, what they can see, and what they can do. Without one, your app has no concept of identity — and that is a serious problem in the real world.
In 2026, web security is not optional. Data breaches, account takeovers, and credential theft are among the most common attack vectors on the internet. Building a proper login system from day one protects your users and builds the trust your application needs to succeed.
If you are learning Python and web development, Flask is one of the best frameworks to start with. It is lightweight, flexible, and incredibly beginner-friendly. If you have not yet built your first Flask app, we recommend starting with our Build a Simple Website Using Flask — The Complete Beginner’s Guide 2026 before diving into authentication.
In this guide, you will learn how to create a login system in Flask from absolute scratch — step by step, with real code, real explanations, and real security practices.
What You Will Build
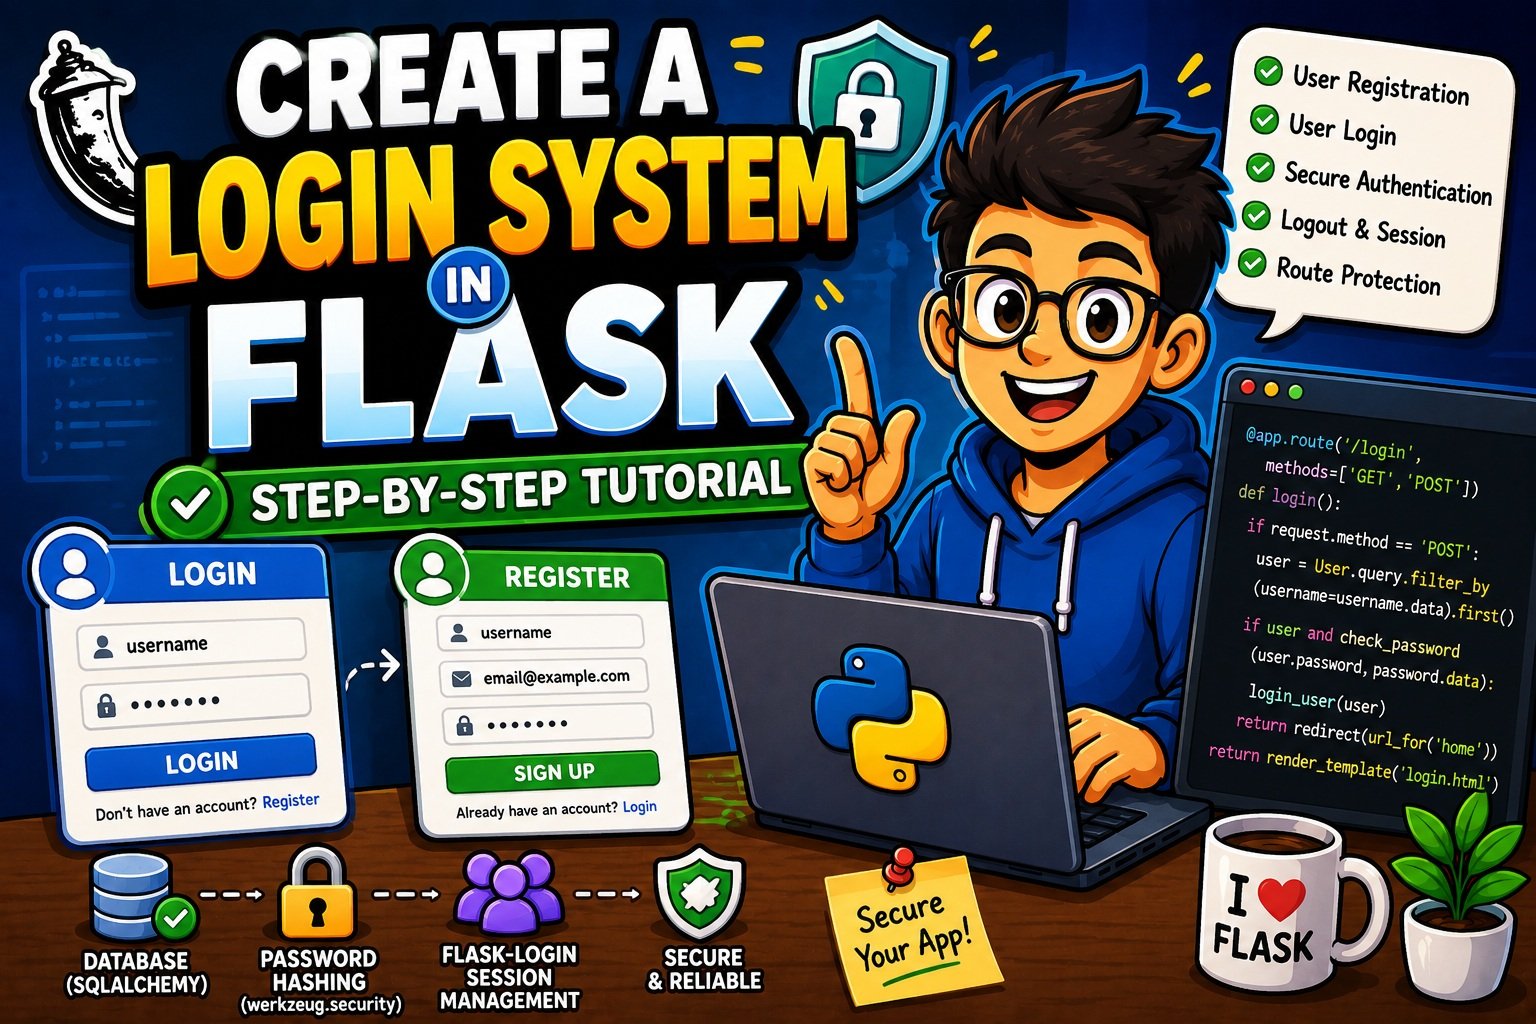
By the end of this tutorial, you will have a fully working Flask authentication system that includes:
- A user registration page where new users can create accounts
- A login page that verifies credentials securely
- Password hashing so passwords are never stored in plain text
- Session management using Flask-Login
- A protected dashboard route that only logged-in users can access
- A logout route that clears the session
- Flash messages for user-friendly error feedback
- CSRF protection on all forms
Tech Stack (as of 2026):
| Package | Version | Purpose |
|---|---|---|
| Flask | 3.x | Core web framework |
| Flask-Login | 0.6.x | Session management |
| Flask-SQLAlchemy | 3.x | Database ORM |
| Werkzeug | 3.x | Password hashing (ships with Flask) |
| Flask-WTF | 1.2.x | Form validation and CSRF protection |
| SQLite | Built-in | Development database |
Prerequisites
This tutorial is designed for beginners, but a few basics will help you follow along more easily:
- Basic Python knowledge — variables, functions, loops, and classes
- Basic HTML — how forms and inputs work
- Some familiarity with how websites work (requests, responses, URLs)
- Python 3.8 or higher installed on your machine
- A code editor — VS Code is recommended
If you are new to Python and still learning the fundamentals, our guide on how to take user input in Python is a helpful warm-up read.
You do not need to be an expert. Every step in this tutorial is explained in plain language.
Setting Up Your Flask Project Structure
Good project structure is a habit worth building early. It makes your code easier to read, maintain, and scale. For this tutorial, we will use the Flask app factory pattern — the recommended approach in 2026 for any non-trivial Flask project.
Here is the folder structure we will build:
flask_auth_app/
└── project/
    ├── __init__.py       ← App factory, extensions, config
    ├── auth.py           ← Registration, login, logout routes
    ├── main.py           ← Protected routes (dashboard, profile)
    ├── models.py         ← User database model
    ├── db.sqlite         ← SQLite database (auto-created)
    └── templates/
        ├── base.html     ← Shared layout with navigation
        ├── index.html    ← Home page
        ├── login.html    ← Login form
        ├── signup.html   ← Registration form
        └── profile.html  ← Protected dashboard page
Why Use the App Factory Pattern?
The app factory pattern separates your Flask app’s creation from its configuration. This makes your code more modular, easier to test, and ready to grow into larger projects with Blueprints.
Step 1: Create the Project and Virtual Environment
Open your terminal and run:
# Create your project folder
mkdir flask_auth_app
cd flask_auth_app

# Create a virtual environment
python -m venv venv

# Activate it (Mac/Linux)
source venv/bin/activate

# Activate it (Windows)
venv\Scripts\activate
Why a virtual environment? It isolates your project’s packages from your global Python installation. This prevents version conflicts and keeps your project clean.
Installing the Required Packages
With your virtual environment active, install all the packages you need in one command:
pip install flask flask-login flask-sqlalchemy flask-wtf
Here is what each package does:
- Flask — The micro web framework itself
- Flask-Login — Manages user sessions (who is logged in, who is not)
- Flask-SQLAlchemy — Connects Flask to a database using Python objects instead of raw SQL
- Flask-WTF — Adds form validation and CSRF protection to your forms
- Werkzeug — Already included with Flask; provides password hashing tools
After installing, save your dependencies:
pip freeze > requirements.txt
This requirements.txt file lets anyone recreate your environment with pip install -r requirements.txt.
If you have ever wondered why Flask requires so many extensions while Django comes with authentication built in, check out our detailed Django vs Flask comparison. Both frameworks are great — they just have different philosophies.
Creating the User Database with Flask-SQLAlchemy
Step 2: Write the User Model (models.py)
The User model is the blueprint for the data you store about each user. Create project/models.py and add:
# project/models.py

from flask_login import UserMixin
from . import db


class User(UserMixin, db.Model):
    """
    User model for authentication.
    UserMixin provides default implementations for:
      - is_authenticated
      - is_active
      - is_anonymous
      - get_id()
    """
    id = db.Column(db.Integer, primary_key=True)
    username = db.Column(db.String(150), unique=True, nullable=False)
    email = db.Column(db.String(150), unique=True, nullable=False)
    password = db.Column(db.String(256), nullable=False)

    def __repr__(self):
        return f"<User {self.username}>"
What each column stores:
| Column | Type | Purpose |
|---|---|---|
id | Integer | Unique identifier for each user |
username | String | Display name (must be unique) |
email | String | Login email (must be unique) |
password | String | Hashed password (NEVER plain text) |
What UserMixin gives you for free:
Flask-Login requires your User class to have four properties and methods. UserMixin provides sensible defaults for all of them:
is_authenticated— ReturnsTrueif the user has valid credentialsis_active— ReturnsTrueif the account is active (not banned)is_anonymous— ReturnsFalsefor real usersget_id()— Returns the user’s ID as a string (used by the session)
Note: The
passwordcolumn stores a hashed value — never the actual password. We will cover this in detail in the password hashing section.
If you want to understand how Python classes and inheritance work under the hood (like UserMixin), our guide on Object-Oriented Programming in Python Explained is an excellent read.
Step 3: Set Up the App Factory (__init__.py)
This is the heart of your Flask application. Create project/__init__.py:
# project/__init__.py

from flask import Flask
from flask_sqlalchemy import SQLAlchemy
from flask_login import LoginManager

# Initialize extensions (without binding to app yet)
db = SQLAlchemy()
login_manager = LoginManager()


def create_app():
    """Application factory function."""
    app = Flask(__name__)

    # ── Core configuration ─────────────────────────────────────────────────
    # SECRET_KEY signs session cookies. Use a long, random string.
    # In production: load from an environment variable, NEVER hardcode.
    app.config["SECRET_KEY"] = "your-very-secret-random-key-change-this"

    # Database configuration (SQLite for development)
    app.config["SQLALCHEMY_DATABASE_URI"] = "sqlite:///db.sqlite"
    app.config["SQLALCHEMY_TRACK_MODIFICATIONS"] = False

    # ── Session cookie security (important!) ───────────────────────────────
    app.config["SESSION_COOKIE_HTTPONLY"] = True   # JS cannot read cookie
    app.config["SESSION_COOKIE_SAMESITE"] = "Lax"  # CSRF protection

    # ── Initialize extensions with the app ─────────────────────────────────
    db.init_app(app)
    login_manager.init_app(app)

    # Tell Flask-Login where the login page is
    login_manager.login_view = "auth.login"
    login_manager.login_message = "Please log in to access this page."
    login_manager.login_message_category = "warning"

    # ── User loader callback ────────────────────────────────────────────────
    from .models import User

    @login_manager.user_loader
    def load_user(user_id):
        """Load user from database given their ID stored in the session."""
        return User.query.get(int(user_id))

    # ── Register Blueprints ────────────────────────────────────────────────
    from .auth import auth as auth_blueprint
    app.register_blueprint(auth_blueprint)

    from .main import main as main_blueprint
    app.register_blueprint(main_blueprint)

    # ── Create database tables ─────────────────────────────────────────────
    with app.app_context():
        db.create_all()

    return app
Key concepts explained:
SECRET_KEY— Flask signs session cookies with this key. If it changes, all existing sessions become invalid. In production, load it from an environment variable:os.environ.get("SECRET_KEY"). Never hardcode it in your source code or commit it to Git.user_loader— This callback is called by Flask-Login on every request that touches a protected route. It takes the user ID stored in the session cookie and returns the matchingUserobject from the database.login_view = "auth.login"— Tells Flask-Login which URL to redirect unauthenticated users to. This makes@login_requiredwork automatically.
Step 4: Create the Entry Point (run.py)
In your root flask_auth_app/ folder (outside project/), create run.py:
# run.py

from project import create_app

app = create_app()

if __name__ == "__main__":
    app.run(debug=True)
⚠️ Important:
debug=Trueis only for development. Never run with debug mode enabled in production — it exposes your application’s internals to anyone who triggers an error.
Building the User Registration System
Step 5: Create the Auth Blueprint (auth.py)
Create project/auth.py:
# project/auth.py

from flask import Blueprint, render_template, redirect, url_for, request, flash
from werkzeug.security import generate_password_hash, check_password_hash
from flask_login import login_user, logout_user, login_required, current_user
from . import db
from .models import User

auth = Blueprint("auth", __name__)


# ── Registration Route ──────────────────────────────────────────────────────

@auth.route("/signup", methods=["GET", "POST"])
def signup():
    """
    GET  → Display the registration form
    POST → Process registration data
    """
    # If the user is already logged in, redirect to dashboard
    if current_user.is_authenticated:
        return redirect(url_for("main.dashboard"))

    if request.method == "POST":
        username = request.form.get("username", "").strip()
        email    = request.form.get("email", "").strip().lower()
        password = request.form.get("password", "")
        confirm  = request.form.get("confirm_password", "")

        # ── Server-side validation ─────────────────────────────────────────

        # Check all fields are filled
        if not all([username, email, password, confirm]):
            flash("All fields are required.", "danger")
            return redirect(url_for("auth.signup"))

        # Minimum password length
        if len(password) < 8:
            flash("Password must be at least 8 characters long.", "danger")
            return redirect(url_for("auth.signup"))

        # Passwords match check
        if password != confirm:
            flash("Passwords do not match.", "danger")
            return redirect(url_for("auth.signup"))

        # Check if email is already registered
        existing_email = User.query.filter_by(email=email).first()
        if existing_email:
            flash("An account with that email already exists.", "danger")
            return redirect(url_for("auth.signup"))

        # Check if username is taken
        existing_user = User.query.filter_by(username=username).first()
        if existing_user:
            flash("That username is already taken.", "danger")
            return redirect(url_for("auth.signup"))

        # ── Create new user ────────────────────────────────────────────────
        hashed_password = generate_password_hash(password)

        new_user = User(
            username=username,
            email=email,
            password=hashed_password
        )

        db.session.add(new_user)
        db.session.commit()

        flash("Account created successfully! Please log in.", "success")
        return redirect(url_for("auth.login"))

    # GET request — render the signup form
    return render_template("signup.html")
What is happening here, step by step:
- The route accepts both GET (show the form) and POST (process the form) requests.
- If the user is already logged in, they are redirected — no need to register again.
- On POST, the form data is retrieved and sanitized (
.strip(),.lower()). - Four validation checks happen server-side: all fields present, password length, passwords match, and no duplicate email or username.
- The password is hashed before saving — never stored as plain text.
- A new
Useris added to the database and the user is redirected to login.
Password Hashing Explained
This section deserves its own spotlight, because password storage is where most beginner mistakes happen.
Why You Must NEVER Store Plain Text Passwords
Imagine your database is compromised tomorrow. If you stored passwords as plain text, every single user’s password is instantly exposed. Users tend to reuse passwords across sites, so one breach can cascade into many. This is one of the most damaging security failures a developer can make.
The solution: hashing.
How Password Hashing Works
Hashing is a one-way mathematical function. You put a password in, you get a fixed-length string of gibberish out. You cannot reverse the process to get the original password back.
Think of it like this: hashing is like putting your password through a one-way blender. You can verify that an ingredient went in — but you cannot reconstruct it from the smoothie.
from werkzeug.security import generate_password_hash, check_password_hash

# ── During Registration (storing the password) ─────────────────────────────
plain_password = "MySecurePass123!"
hashed = generate_password_hash(plain_password)

print(hashed)
# Output: pbkdf2:sha256:600000$randomsalt$longhashstring...

# ── During Login (verifying the password) ─────────────────────────────────
is_correct = check_password_hash(hashed, "MySecurePass123!")
print(is_correct)  # True

is_wrong = check_password_hash(hashed, "WrongPassword")
print(is_wrong)    # False
What is PBKDF2-SHA256?
Werkzeug uses PBKDF2 (Password-Based Key Derivation Function 2) with SHA-256 as its default algorithm in 2026. Here is why it is secure:
- Salt — A unique random value is automatically added to each password before hashing. Two users with the same password will have completely different hashes. This defeats precomputed “rainbow table” attacks.
- Iterations — The hash is computed hundreds of thousands of times, making brute-force attacks computationally expensive.
- Non-reversible — You cannot decode the hash back to the password.
Note for advanced users: For even stronger hashing, consider bcrypt or Argon2 (the winner of the Password Hashing Competition). Werkzeug’s PBKDF2-SHA256 is secure and sufficient for most applications, especially for beginners.
Building the Login Route
Step 6: Add the Login Route to auth.py
Add the following login route to your project/auth.py file:
# ── Login Route ─────────────────────────────────────────────────────────────

@auth.route("/login", methods=["GET", "POST"])
def login():
    """
    GET  → Display the login form
    POST → Verify credentials and log the user in
    """
    # Redirect already-authenticated users
    if current_user.is_authenticated:
        return redirect(url_for("main.dashboard"))

    if request.method == "POST":
        email    = request.form.get("email", "").strip().lower()
        password = request.form.get("password", "")
        remember = True if request.form.get("remember") else False

        # ── Security tip: Use a generic error message ─────────────────────
        # Never reveal whether the email exists or the password was wrong.
        # Both failures produce the same message to prevent user enumeration.
        error_message = "Invalid email or password. Please try again."

        # Step 1: Find the user by email
        user = User.query.filter_by(email=email).first()

        # Step 2: Check if user exists AND password matches
        if not user or not check_password_hash(user.password, password):
            flash(error_message, "danger")
            return redirect(url_for("auth.login"))

        # Step 3: Log the user in — Flask-Login sets the session cookie
        login_user(user, remember=remember)

        # Step 4: Redirect to the page they originally requested (if any)
        next_page = request.args.get("next")
        if next_page:
            return redirect(next_page)

        flash(f"Welcome back, {user.username}!", "success")
        return redirect(url_for("main.dashboard"))

    # GET request — render the login form
    return render_template("login.html")
Breaking down the login logic:
User.query.filter_by(email=email).first()— Searches the database for a user with that email. ReturnsNoneif no match is found.check_password_hash(user.password, password)— Verifies the submitted password against the stored hash.login_user(user, remember=remember)— This is where Flask-Login takes over. It stores the user’s ID in a signed session cookie, marking them as authenticated for subsequent requests.- Generic error message — We use the same message whether the email does not exist or the password is wrong. This prevents user enumeration attacks, where an attacker could discover which emails are registered.
request.args.get("next")— If a user tried to visit a protected page before logging in, Flask-Login adds a?next=/dashboardparameter to the login URL. After login, we redirect them to where they originally wanted to go.
What Does login_user() Actually Do?
login_user() calls Flask-Login’s session management to:
- Store the user’s ID in the Flask session (a server-signed cookie)
- Set
current_userto the actualUserobject for the rest of that request - If
remember=True, set a long-lived persistent cookie so the user stays logged in across browser restarts
Creating Logout Functionality
Step 7: Add the Logout Route to auth.py
# ── Logout Route ─────────────────────────────────────────────────────────────

@auth.route("/logout")
@login_required
def logout():
    """
    Clears the user's session and redirects to the login page.
    @login_required ensures only logged-in users can hit this route.
    """
    logout_user()
    flash("You have been logged out successfully.", "info")
    return redirect(url_for("auth.login"))
This is intentionally simple. logout_user() does the following:
- Removes the user’s ID from the session cookie
- Clears the “remember me” persistent cookie if one was set
- Sets
current_userback to an anonymous user object
After calling logout_user(), any subsequent requests from the same browser will be treated as unauthenticated.
Understanding Flask Sessions and Cookies
When a user logs in, Flask does not store “this user is logged in” on the server in memory. Instead, it sends a signed cookie to the user’s browser. Every subsequent request from that browser includes the cookie, and Flask verifies the signature to confirm it has not been tampered with.
Here is the flow visualized:
User submits login form
        │
        ▼
Flask verifies credentials
        │
        ▼
login_user(user) called
        │
        ▼
Flask session cookie set on browser
  { "user_id": 42, "_signature": "abc123..." }
        │
        ▼
User visits protected page
        │
        ▼
Browser sends cookie with request
        │
        ▼
Flask verifies signature with SECRET_KEY
        │
        ▼
user_loader callback fetches User(id=42) from DB
        │
        ▼
current_user = User object → Access granted ✅
Session Cookie Security Configuration
In your __init__.py, these settings protect the session cookie:
app.config["SESSION_COOKIE_HTTPONLY"] = True    # JavaScript cannot read it (blocks XSS theft)
app.config["SESSION_COOKIE_SAMESITE"] = "Lax"  # Browser won't send cookie on cross-site requests (CSRF protection)

# Add this in PRODUCTION when using HTTPS:
# app.config["SESSION_COOKIE_SECURE"] = True   # Cookie only sent over HTTPS
Protecting Routes with @login_required
Step 8: Create the Main Blueprint (main.py)
Create project/main.py:
# project/main.py

from flask import Blueprint, render_template
from flask_login import login_required, current_user

main = Blueprint("main", __name__)


@main.route("/")
def index():
    """Public home page — anyone can see this."""
    return render_template("index.html")


@main.route("/dashboard")
@login_required
def dashboard():
    """
    Protected dashboard — only logged-in users.

    If an unauthenticated user visits /dashboard:
    → Flask-Login redirects them to /login?next=/dashboard
    → After logging in, they are sent to /dashboard automatically
    """
    return render_template("profile.html", name=current_user.username)
The @login_required decorator is what makes route protection so clean in Flask. Instead of writing if not current_user.is_authenticated: return redirect(...) in every route, you simply decorate it.
Understanding how Python decorators work under the hood will make you a much better Flask developer. If decorators feel like magic to you right now, our Python Decorators Made Simple guide breaks them down in plain English.
Using current_user in Templates
current_user is a special proxy provided by Flask-Login. You can use it directly in Jinja2 templates:
<!-- templates/base.html -->
<nav>
  {% if current_user.is_authenticated %}
    <span>Hello, {{ current_user.username }}!</span>
    <a href="{{ url_for('auth.logout') }}">Logout</a>
  {% else %}
    <a href="{{ url_for('auth.login') }}">Login</a>
    <a href="{{ url_for('auth.signup') }}">Sign Up</a>
  {% endif %}
</nav>
HTML Templates
Step 9: Create the Base Template (base.html)
Create project/templates/base.html:
<!DOCTYPE html>
<html lang="en">
<head>
  <meta charset="UTF-8">
  <meta name="viewport" content="width=device-width, initial-scale=1.0">
  <title>Flask Auth App</title>
  <style>
    body { font-family: Arial, sans-serif; max-width: 600px; margin: 40px auto; padding: 0 20px; }
    .alert { padding: 10px 15px; border-radius: 4px; margin-bottom: 15px; }
    .alert-danger  { background: #f8d7da; color: #721c24; border: 1px solid #f5c6cb; }
    .alert-success { background: #d4edda; color: #155724; border: 1px solid #c3e6cb; }
    .alert-warning { background: #fff3cd; color: #856404; border: 1px solid #ffeeba; }
    .alert-info    { background: #d1ecf1; color: #0c5460; border: 1px solid #bee5eb; }
    input { display: block; width: 100%; padding: 8px; margin: 8px 0 16px; box-sizing: border-box; }
    button { padding: 10px 20px; background: #007bff; color: white; border: none; border-radius: 4px; cursor: pointer; }
    nav a { margin-right: 15px; text-decoration: none; color: #007bff; }
  </style>
</head>
<body>

  <nav>
    <a href="{{ url_for('main.index') }}">Home</a>
    {% if current_user.is_authenticated %}
      <a href="{{ url_for('main.dashboard') }}">Dashboard</a>
      <a href="{{ url_for('auth.logout') }}">Logout</a>
      <span style="float:right; color: #555;">Hello, <strong>{{ current_user.username }}</strong>!</span>
    {% else %}
      <a href="{{ url_for('auth.login') }}">Login</a>
      <a href="{{ url_for('auth.signup') }}">Sign Up</a>
    {% endif %}
  </nav>
  <hr>

  <!-- Flash messages section -->
  {% with messages = get_flashed_messages(with_categories=true) %}
    {% if messages %}
      {% for category, message in messages %}
        <div class="alert alert-{{ category }}">{{ message }}</div>
      {% endfor %}
    {% endif %}
  {% endwith %}

  <!-- Page content -->
  {% block content %}{% endblock %}

</body>
</html>
Step 10: Create the Signup Template (signup.html)
<!-- project/templates/signup.html -->
{% extends "base.html" %}

{% block content %}
<h2>Create an Account</h2>

<form method="POST" action="{{ url_for('auth.signup') }}">
  <!-- Flask-WTF CSRF token (add after enabling CSRFProtect in __init__.py) -->
  {{ csrf_token() if csrf_token is defined }}

  <label for="username">Username</label>
  <input type="text" id="username" name="username" required minlength="3" maxlength="150">

  <label for="email">Email Address</label>
  <input type="email" id="email" name="email" required>

  <label for="password">Password</label>
  <input type="password" id="password" name="password" required minlength="8"
         placeholder="At least 8 characters">

  <label for="confirm_password">Confirm Password</label>
  <input type="password" id="confirm_password" name="confirm_password" required>

  <button type="submit">Create Account</button>
</form>

<p>Already have an account? <a href="{{ url_for('auth.login') }}">Log in here</a></p>
{% endblock %}
Step 11: Create the Login Template (login.html)
<!-- project/templates/login.html -->
{% extends "base.html" %}

{% block content %}
<h2>Log In</h2>

<form method="POST" action="{{ url_for('auth.login') }}">
  <label for="email">Email Address</label>
  <input type="email" id="email" name="email" required>

  <label for="password">Password</label>
  <input type="password" id="password" name="password" required>

  <label>
    <input type="checkbox" name="remember"> Remember me
  </label>

  <button type="submit">Log In</button>
</form>

<p>Don't have an account? <a href="{{ url_for('auth.signup') }}">Sign up here</a></p>
{% endblock %}
Step 12: Create the Dashboard Template (profile.html)
<!-- project/templates/profile.html -->
{% extends "base.html" %}

{% block content %}
<h2>Welcome to your Dashboard, {{ name }}! 🎉</h2>
<p>You are successfully logged in. This page is only visible to authenticated users.</p>

<h3>Your Account Info</h3>
<ul>
  <li><strong>Username:</strong> {{ current_user.username }}</li>
  <li><strong>Email:</strong> {{ current_user.email }}</li>
  <li><strong>Account ID:</strong> {{ current_user.id }}</li>
</ul>

<p><a href="{{ url_for('auth.logout') }}">Log out</a></p>
{% endblock %}
Flash Messages and Error Handling
Flash messages give users instant, clear feedback about what happened — whether a form succeeded, failed, or needs their attention.
How Flash Messages Work in Flask
# In your route (Python side)
from flask import flash

flash("Account created successfully!", "success")
flash("Invalid email or password.", "danger")
flash("Please log in to access this page.", "warning")
The category ("success", "danger", "warning", "info") maps to CSS classes in your template for color-coded styling. In the base.html template above, the {% with messages = get_flashed_messages(with_categories=true) %} block displays all queued flash messages at the top of every page.
Error Handling Best Practices
When something goes wrong in your Flask app, you want clear errors that help the developer — but do not leak sensitive information to users. Here are the key principles:
1. Generic authentication errors
# ✅ Correct — does not reveal whether email exists
flash("Invalid email or password. Please try again.", "danger")

# ❌ Wrong — reveals that the email IS registered (user enumeration)
flash("Incorrect password for user@example.com.", "danger")
2. Specific validation errors
For non-security fields like username availability, specific messages are fine:
flash("That username is already taken. Please choose another.", "danger")
3. Handling unexpected errors gracefully
For database errors, wrap critical operations in try/except:
try:
    db.session.add(new_user)
    db.session.commit()
except Exception:
    db.session.rollback()
    flash("Something went wrong. Please try again.", "danger")
    return redirect(url_for("auth.signup"))
Struggling to track down bugs in your Flask routes? Our step-by-step guide on how to debug Python code covers practical debugging techniques that work perfectly for Flask applications.
Enabling CSRF Protection with Flask-WTF
CSRF (Cross-Site Request Forgery) is an attack where a malicious website tricks a logged-in user’s browser into submitting a form to your app without their knowledge.
Step 13: Enable CSRF Protection
In project/__init__.py, add:
from flask_wtf.csrf import CSRFProtect

csrf = CSRFProtect()

def create_app():
    app = Flask(__name__)
    # ... existing config ...

    csrf.init_app(app)

    # ... rest of factory ...
In your HTML forms, add the CSRF token:
<form method="POST">
  <input type="hidden" name="csrf_token" value="{{ csrf_token() }}">
  <!-- rest of your form -->
</form>
With CSRFProtect(app), every POST request to your app must include a valid CSRF token. If it does not, Flask returns a 400 error. This prevents malicious sites from submitting forms on behalf of your logged-in users.
Running Your Flask Login System
With all files in place, start your application:
# From flask_auth_app/ with venv active
python run.py
Open your browser and visit:
http://localhost:5000/— Home pagehttp://localhost:5000/signup— Create an accounthttp://localhost:5000/login— Log inhttp://localhost:5000/dashboard— Protected page (redirects to login if not authenticated)http://localhost:5000/logout— Log out
Try these steps to test your system:
- Visit
/dashboardwithout logging in — you should be redirected to/login - Register a new account at
/signup - Log in with your new credentials
- Visit
/dashboard— you should now see the welcome message - Click Logout — the session is cleared and you are redirected
Security Best Practices for Flask Login Systems (2026)
Building a login system that works is one thing. Building one that is secure is another. Here are the most important security practices for Flask authentication in 2026, based on guidance from the official Flask documentation, OWASP, and the Flask-Login documentation.
✅ 1. Always Hash Passwords — No Exceptions
# ✅ Correct
password = generate_password_hash(plain_password)

# ❌ Never do this
password = plain_password  # Plain text — catastrophic if DB is breached
✅ 2. Store SECRET_KEY in Environment Variables
# ✅ Correct — load from environment
import os
app.config["SECRET_KEY"] = os.environ.get("SECRET_KEY", "fallback-for-dev-only")

# ❌ Wrong — hardcoded in source code committed to Git
app.config["SECRET_KEY"] = "mysecretkey"
Create a .env file (and add it to .gitignore):
SECRET_KEY=a1b2c3d4e5f6-long-random-string-here
✅ 3. Enable CSRF Protection on All Forms
As shown above, use CSRFProtect(app) from Flask-WTF on all POST forms. Any form that changes state (login, signup, profile update, deletion) must be CSRF-protected.
✅ 4. Set Secure Session Cookie Flags
app.config["SESSION_COOKIE_HTTPONLY"] = True   # Blocks XSS cookie theft
app.config["SESSION_COOKIE_SAMESITE"] = "Lax"  # Blocks CSRF via cookies
app.config["SESSION_COOKIE_SECURE"] = True      # HTTPS only (production)
✅ 5. Enforce Password Strength
Require passwords to be at least 8 characters. For production apps, also check for a mix of uppercase, lowercase, numbers, and symbols:
import re

def is_strong_password(password):
    if len(password) < 8:
        return False
    if not re.search(r"[A-Z]", password):
        return False
    if not re.search(r"[0-9]", password):
        return False
    return True
✅ 6. Never Reveal Whether an Email Exists
Use the same generic error message for both “email not found” and “wrong password” scenarios. This prevents user enumeration attacks.
✅ 7. Use HTTPS in Production
Session cookies, login credentials, and all user data should only travel over encrypted connections. Use a service like Let’s Encrypt (free) with Nginx or a platform like Heroku, Render, or Railway that provides HTTPS by default.
✅ 8. Limit Login Attempts (Brute-Force Protection)
For production apps, add rate limiting using Flask-Limiter:
pip install flask-limiter
from flask_limiter import Limiter
from flask_limiter.util import get_remote_address

limiter = Limiter(get_remote_address, app=app)

@auth.route("/login", methods=["GET", "POST"])
@limiter.limit("10 per minute")
def login():
    # ... login logic ...
This blocks attackers who try thousands of password combinations automatically.
✅ 9. Disable Debug Mode in Production
# Development only
app.run(debug=True)

# Production — use a proper WSGI server (gunicorn, uWSGI)
# gunicorn -w 4 "project:create_app()"
✅ 10. Add Email Verification (Recommended Next Step)
For production applications, send a verification email after registration to confirm the user owns the email address. Want to add this feature? Our guide on how to send emails automatically using Python walks you through the process step by step.
Common Mistakes Beginners Make When Building Flask Login Systems
Learning from mistakes — especially other people’s — is one of the fastest ways to grow as a developer. Here are the ten most common errors beginners make when building Flask authentication systems:
❌ Mistake 1: Storing Passwords in Plain Text
The problem: Storing user.password = "mypassword" directly.
The fix: Always use generate_password_hash() before saving, and check_password_hash() when verifying.
❌ Mistake 2: Hardcoding the SECRET_KEY
The problem: Writing app.config["SECRET_KEY"] = "abc123" and committing it to GitHub.
The fix: Use os.environ.get("SECRET_KEY") and keep the value in a .env file that is listed in .gitignore.
❌ Mistake 3: Skipping CSRF Protection
The problem: Forms without CSRF tokens are vulnerable to cross-site request forgery.
The fix: Install Flask-WTF, enable CSRFProtect(app), and include {{ csrf_token() }} in every form.
❌ Mistake 4: Forgetting @login_required on Sensitive Routes
The problem: Leaving dashboard, settings, or admin routes unprotected.
The fix: Add @login_required to every route that requires authentication.
❌ Mistake 5: Only Validating on the Client Side
The problem: Relying on HTML required attributes or JavaScript validation only.
The fix: Always validate on the server side. Client-side validation is a UX convenience — it can be bypassed.
❌ Mistake 6: Running DEBUG=True in Production
The problem: Debug mode shows stack traces, source code, and an interactive debugger to anyone who triggers an error in your app.
The fix: Use DEBUG=False in production. Use environment variables to control this: app.run(debug=os.environ.get("FLASK_DEBUG", "False") == "True").
❌ Mistake 7: Revealing Whether an Email Exists on Failed Login
The problem: Showing “No account found for that email” tells attackers which emails are registered.
The fix: Always show a generic message: “Invalid email or password.”
❌ Mistake 8: Not Using a Virtual Environment
The problem: Installing packages globally causes version conflicts across projects.
The fix: Always create a virtual environment per project. See Step 1 above.
❌ Mistake 9: Committing .env Files to Git
The problem: Pushing your secret key, database credentials, or API keys to a public repository.
The fix: Add .env to your .gitignore file immediately when you create the project.
❌ Mistake 10: Ignoring Session Cookie Security Flags
The problem: Not setting HTTPONLY, SECURE, and SAMESITE flags leaves cookies vulnerable to XSS and CSRF attacks.
The fix: Configure all three flags in create_app() as shown in the security section above.
Want to make sure you have solid Python fundamentals before taking on bigger Flask projects? Browse our Top 20 Python Interview Questions for Beginners 2026 — it covers many of the concepts that trip up beginners early on.
FAQs
❓ What is Flask-Login and why do I need it?
Flask-Login is a Python extension that handles user session management in Flask applications. It manages logging in, logging out, and “remember me” functionality. Without it, you would have to manually manage session cookies, track user IDs, and handle authentication state on every single request — which is tedious and error-prone. Flask-Login solves all of this cleanly. You can read its full documentation at flask-login.readthedocs.io.
❓ How do I protect a route so only logged-in users can access it?
Add @login_required above your route function:
from flask_login import login_required

@app.route("/dashboard")
@login_required
def dashboard():
    return "This is protected!"
Unauthenticated users are automatically redirected to your login page.
❓ How does password hashing work in Flask?
Flask uses Werkzeug’s generate_password_hash() to transform a plain text password into an irreversible hash string. During login, check_password_hash() compares the submitted password against the stored hash without ever decoding it.
❓ Should I use SQLite or PostgreSQL for my Flask login system?
SQLite is perfect for learning, development, and small hobby projects — it requires no separate server and stores everything in a single file. For production applications with real users, switch to PostgreSQL or MySQL using Flask-SQLAlchemy. The Python code barely changes; only the database URI in your config needs updating.
❓ What is the SECRET_KEY in Flask and why is it important?
The SECRET_KEY is used to cryptographically sign Flask’s session cookies. If it is weak or publicly known, attackers can forge session cookies and impersonate any user. Always use a long, random key and store it in an environment variable — never hardcode it in your source code.
❓ How do I add “remember me” functionality?
Pass remember=True to login_user():
remember = True if request.form.get("remember") else False
login_user(user, remember=remember)
Flask-Login will set a persistent cookie that keeps the user logged in even after closing their browser.
❓ Is Flask-Login still the best option in 2026?
Yes. Flask-Login 0.6.x remains the standard library for session-based authentication in Flask web applications. For REST APIs or Single Page Applications (SPAs) that need stateless authentication, Flask-JWT-Extended is the modern alternative. For OAuth-based login (“Sign in with Google”), Authlib is widely used in 2026.
❓ What is CSRF protection and do I need it in Flask?
CSRF (Cross-Site Request Forgery) is an attack where a malicious website tricks your logged-in users into submitting forms to your application without their knowledge. Flask does not enable CSRF protection by default. Install and enable Flask-WTF (CSRFProtect(app)) and include {{ csrf_token() }} in all your forms. Any modern Flask application that uses session-based authentication needs CSRF protection.
Conclusion
Congratulations — you have just built a complete, secure Flask login system from scratch. Let us recap what you accomplished:
- ✅ Set up a Flask app factory with proper project structure
- ✅ Created a User database model with Flask-SQLAlchemy and UserMixin
- ✅ Built a registration system with server-side validation
- ✅ Implemented password hashing with Werkzeug’s PBKDF2-SHA256
- ✅ Created a secure login route with generic error messages
- ✅ Added logout functionality that fully clears the session
- ✅ Protected routes using the
@login_requireddecorator - ✅ Implemented flash messages for user feedback
- ✅ Applied CSRF protection with Flask-WTF
- ✅ Followed 2026 security best practices throughout